VIDEO + TUTORIAL: SVG file not showing up in Cricut Design Space
You bought an SVG file and import it into Cricut Design Space. But you don’t see it on the mat; it is not showing up. The design imports HUGE! Here is what to do when you import an SVG file into Cricut Design Space but the design is is huge.
CLICK HERE to SUBSCRIBE to our YouTUBE channel. Also please LIKE this video and hit the BELL to be notified when we upload new videos.
With the new update of Cricut Design Space, many people are having a challenging time finding their design on the mat when importing a design. Here I will outline the steps on how to resize and center the design so it shows up in your software.
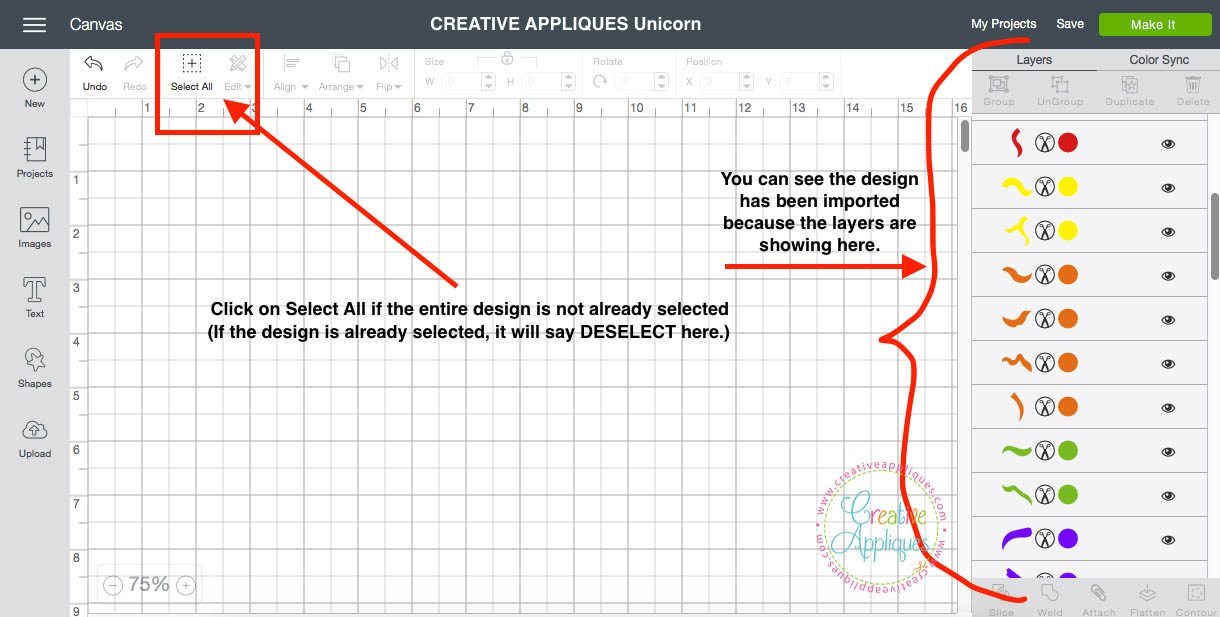
Open Cricut Design Space and upload/import your design as you normally would. Now your design may not be showing on the mat but you know it is there because you can see all the color layers on the right side of your screen.
First, thing you want to do is SELECT ALL if the design is not already selected. (If the design is selected already you will see DESELECT instead.)
After you have clicked on SELECT ALL, you will want to resize the design. On the same toolbar, over to the right, find the word SIZE. You will change the design size numbers inside one of the boxes, either the width or the height. Make sure the little lock next to the word SIZE is closed so you adjust the design proportionally; that way you will only need to change one set of numbers. You can do this one of two ways:
1. Inside the left width box, left click and hold to highlight the numbers. Then type on your computer keyboard the number of the width you want the design to be.
OR
2. Use the arrow pointing down that is to the right of the box to change the numbers to make the design smaller.

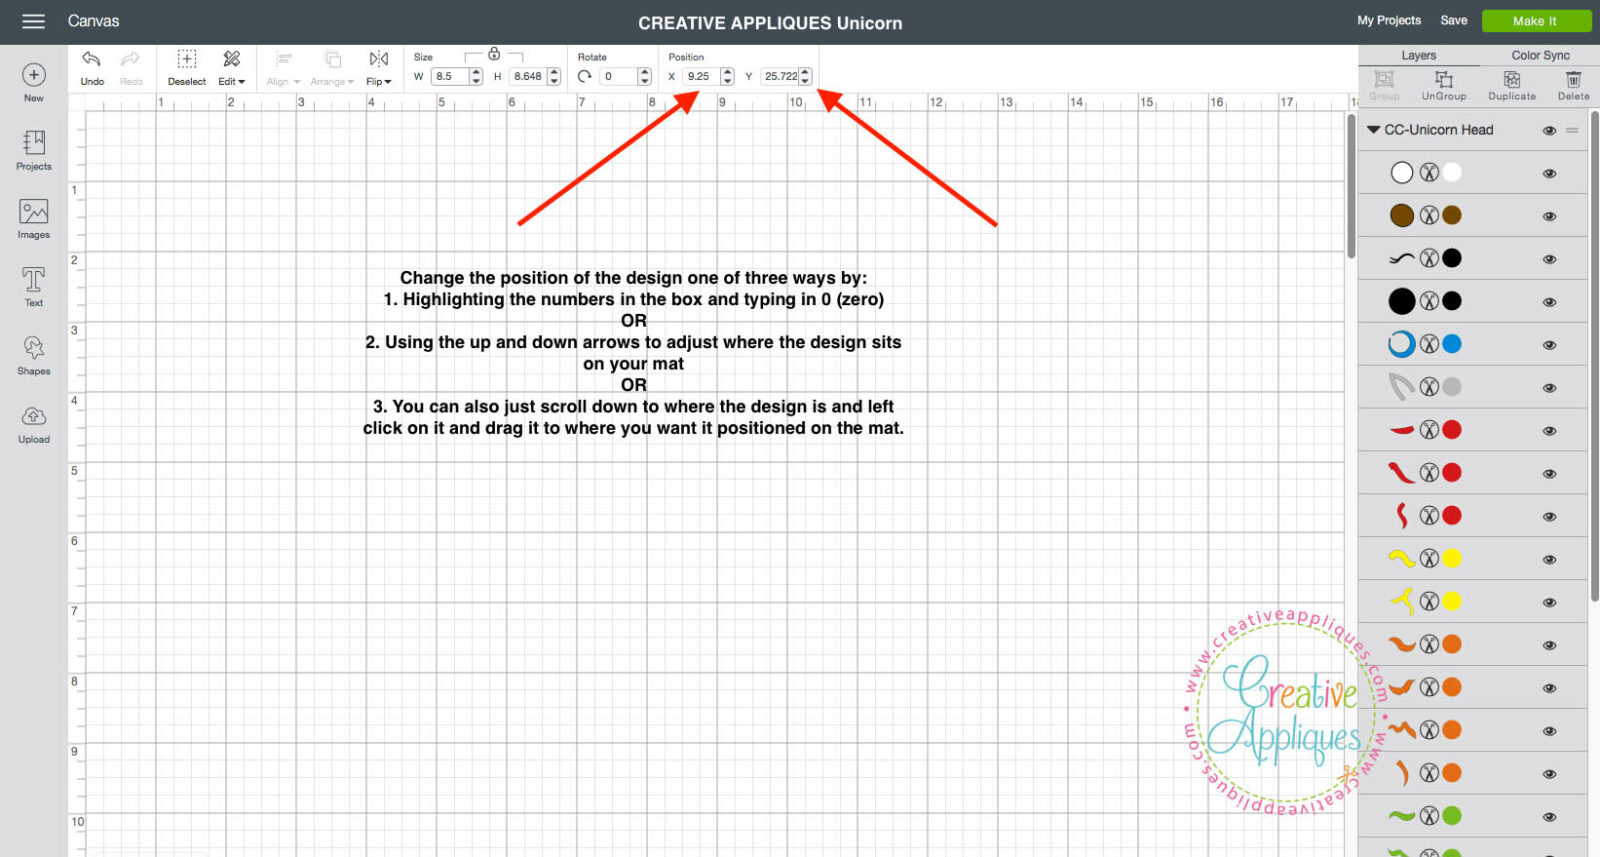
Once the design is resized, then we will move the design to show on our mat. Still on the same toolbar, over further to the right you will find the word POSITION. We will need to change the numbers in both of these boxes in order for the design to show up in Cricut design space. Doing the same thing we did to resize the design, we will move the design. There are three (3) options you could use to move the design:
1. Inside the left X box, left click and hold to highlight the numbers. Then type on your computer keyboard a number of where you want the design positioned. I typically type 0 (zero) just to get the design into the window. Repeat this in the Y box to the right of it.
OR
2. Use the arrow pointing down that is to the right of the box to change the numbers to move the design. Do this in both the X and the Y box.
OR
3. You could just scroll down to where the design is and click on it to move the design up into the design space to cut.
Now you can see the design is centered on the mat ready to be cut. I hope this information was helpful.
Until next time, keep being Creative!